


Bathroom Vanity Ugrade
DIY BATHROOM VANITY | CUSTOM BATHROOM FROM MARKETPLACE FIND | BATHROOM MAKEOVER


We laid the pieces out in three different directions. If I were doing a larger piece, I may do more, but I felt it would be too busy for this vanity.


We used a sharpie, angle finder, and a speed square to mark where we needed to cut each piece.

We made a little jig to keep the spacing between each piece exactly even.

We used wood glue to secure each piece onto the vanity.

Then we nailed the pieces on with a nail gun.

I used Durham's wood putty to fill the holes. You will definitely want to fill them or they will be noticable.


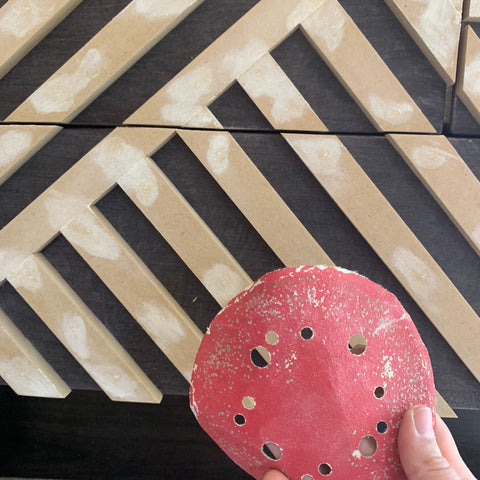
Be sure to sand off the extra putty after it's completely dry. I used this random piece of sandpaper from my power sander because it was the closet one to me.
After all holes are filled and the putty is dry you can caulk the edges. I recommend this step not only for a professional look, but also to seal the gaps between the wood pieces and the vanity--you don't want moisture from a humid bathroom to get into any gaps.

Once all the holes were filled and caulk was dry I was ready to being painting. I mixed BB Frösch Paint transformer with the color "Truly Olive" by Behr.

For this project I used a medium paint brush. You can see where I used a paint sprayer on a similar project here.

Make sure your first coat is THIN. This coat acts as your bonding coat. Remember to paint in cross-hatch strokes to promote self leveling.

This vanity only took about 2.5 coats. The vanity was turning out even better than I imagined!

I choose to seal with this with a water based poly. I used the one pictured below. I did three coats, letting dry completely between coats.

I do not like my furniture right on the floor. I like when things are lifted up. So, we added legs. They were ones I had on hand from another project but you can find similar ones here. I did sand through the previous finish then used BB Frösch premium finishing dark wax.


We then added a 1x6 board for the toe kick which I also dark waxed.

With the vanity rebuilt, painted and sealed, we added these handles.

FINALLY the vanity is done and ready to go in the bathroom. Take a look...

*We also redid the floors, added can lights, replaced the tub, added tile, & added trim around the ceiling.


